 By Colin Foster
DIY for Christmas decorations is one of the most satisfying ways to make your home feel personal during the holidays. In this guide you will learn how to plan a homemade decor scheme, gather the right materials, and complete projects that look polished rather than crafty in the wrong way. By the end, you will have a clear process you can repeat for wreaths, garland, centerpieces and ornaments, plus a short list of tools that make the work easier.
Start With a Plan Before You Cut or Glue Anything
Most homemade decor disappointments come from skipping the planning stage. A quick plan keeps you from buying forty pinecones when you only needed twelve, and it helps every piece belong to the same visual story. Before you start, decide three things: the room or area you are decorating, the color palette, and how much time you actually have.
Shopping for one? See our guide: 8 Best Antique Vintage Christmas Decorations for Heirloom Holiday Style.
Choose a Color Palette First
Limit yourself to three colors plus one neutral. For example, a forest green, cream and warm gold palette with natural wood tones reads as cohesive even when each project is different. If you are unsure where to begin, the guide to Red and Green Christmas Decor: How to Make the Classic Palette Look Fresh is a useful reference, though you can apply the same logic to any palette. Hold paint chips, fabric swatches or photos next to each other before committing.
Sketch the Placement
Measure the spaces you plan to decorate. A standard door wreath usually works best between 18 and 24 inches across, while a mantel garland often looks balanced when it runs the full width of the mantel with a slight sag at the center. Write down measurements, then note where light fixtures, outlets and doors will interfere with your design.
Set a Realistic Time Budget
A simple pinecone or ribbon project can take under an hour. A fully wrapped garland, a layered wreath or a set of sewn fabric ornaments can take an entire weekend. Block your time honestly, then choose projects that fit inside it.
Gather the Right Materials and Tools
Good DIY results depend on sturdy materials and a few reliable tools. Buy in batches once you know the quantities you need, and test a small sample before committing to a large order.
- A hot glue gun with a supply of full-size sticks, plus a low-temperature gun for delicate materials
- Floral wire in 22 to 24 gauge for wrapping stems and joining sprigs
- Wire cutters or sturdy scissors that will not crush wire ends
- Ribbon in two widths, usually 1.5 inches and 2.5 inches, for bows and accents
- A base form, such as a foam or wire wreath frame, a grapevine ring, or a metal hoop
- Natural greenery such as cedar, eucalyptus or faux stems that match your palette
- Small embellishments like berries, pinecones, wooden stars or dried orange slices
- A tape measure, painter’s tape and a pencil for marking placement
Twelve Easy DIY Christmas Decoration Projects
The following projects cover the most common decorating needs. Each one follows the same logic: build a base, layer your materials, then anchor everything securely.
Wreath With Layered Greenery
Start with a wire wreath form. Cut greenery into sprigs about 6 to 8 inches long, then wire three or four sprigs together into a small bundle. Attach each bundle to the frame, overlapping the stems of the previous one so the cut ends stay hidden. Work in one direction around the circle for consistency. Add a bow or a few picks at the end, keeping the bow on the left side if you want a classic look.
Pinecone Garland
Thread heavy twine through a blunt needle and tie it around the base of each pinecone, spacing them roughly 3 to 4 inches apart. Drape the finished strand along a mantel or staircase. To add color, lightly spray the tips with white paint or dust them with glitter before tying.
Fabric Ribbon Tree Topper
Cut several lengths of ribbon about 18 inches long. Fold each one in half, slide the fold under the topper’s base, and tighten. Stagger the lengths so the ribbon falls at different heights. This takes about 20 minutes and looks elegant on either a real or artificial tree.
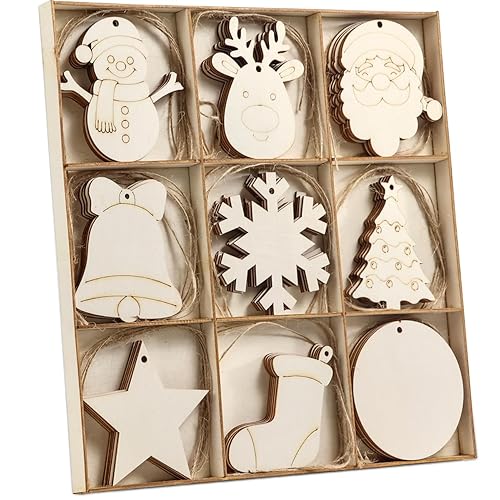
Wooden Star Ornaments
Cut stars from thin plywood or basswood using a scroll saw or a craft saw. Sand the edges, paint or stain them, then drill a small hole at the top point and thread through a loop of ribbon. Sealing with a matte clear coat protects the finish.
Mason Jar Candle Centerpiece
Fill a clean jar with a layer of faux snow or dried beans, add a flameless pillar candle, then tie a strip of burlap or ribbon around the neck. Group three jars of different heights for a balanced arrangement. Flameless candles are the safer choice for any setting where pets or children are present.
Felt Ornaments
Trace a cookie-cutter shape onto felt, cut two identical pieces, and stitch them together with a running stitch, leaving a small gap for stuffing. Fill with polyester stuffing, sew the gap closed, and attach a loop of thread at the top. These are excellent projects for beginners.
Painted Glass Ornaments
Use clear glass ornaments and acrylic or glass paint in a single color or a graded wash. Let each coat dry fully before adding the next. Painted interiors are easier to control than exteriors and are less likely to smudge.
Mantel Swag
Layer two lengths of garland together for fullness. Tuck in a few sprigs of greenery, then add a row of ornaments at intervals of 8 to 10 inches. Secure the swag with floral tape at the ends and at the center.
Burlap Door Hanger
Cut a strip of burlap about 12 inches wide and wrap it around a wire frame. Tie it in a loose bow and add a small wooden sign or a bundle of cinnamon sticks. This piece works well for rustic styling. Our guide to Rustic Christmas Decor Ideas: Natural, Textured and Warm explores more options in this style.
Cinnamon Stick Bundles
Group five to seven cinnamon sticks, tie them with twine, and add a sprig of greenery or a dried orange slice. Hang them from a tree branch or a doorknob. These bundles are lightweight and smell wonderful.
Dried Orange Slices
Slice oranges about a quarter inch thick and dry them on a wire rack in a low oven, around 200°F, for two to four hours, turning once. They can be strung into garland or tucked into wreaths. Dry them slowly to avoid scorching.
Paper Snowflake Garland
Fold square cardstock into quarters or sixths, cut shapes along the folds, then unfold. Thread the snowflakes onto twine using a hole punch at the top edge. For a more durable version, laminate the paper first.
Mini Wreath Place Cards
Wrap a 3-inch wire ring with thin greenery and tie a small tag onto each one. These work as place cards, favors or tree ornaments.
Comparing Common DIY Projects
Use this table to match a project to your skill level and available time.
| Project | Skill level | Approximate time | Best location |
|---|---|---|---|
| Felt ornaments | Beginner | 1 to 2 hours | Tree |
| Pinecone garland | Beginner | 1 to 2 hours | Mantel, stairs |
| Layered wreath | Intermediate | 2 to 3 hours | Front door |
| Painted glass ornaments | Intermediate | Several hours with drying | Tree |
| Mantel swag | Intermediate | 2 hours | Mantel |
Safety and Placement Considerations
Homemade decor can introduce fire, tripping and choking hazards if you are not careful. Use flameless candles near curtains or dry greenery. Keep small embellishments such as beads, buttons and glitter out of reach of young children and pets. Check that any garland or wreath hung near a heat source or fireplace is made from fire-resistant material, and avoid stringing decorations across walkways. If you plan to hang heavy projects from ceilings or walls, confirm your anchors are rated for the weight. For electrical lighting, consult a qualified electrician if you are unsure about load limits.
Common Mistakes to Avoid
- Overloading a single project with too many colors or textures, which makes the result look busy
- Using hot glue on fabric that will be stored in heat, since the glue can soften and stain
- Skipping the test piece, which can waste materials if a finish or adhesive does not behave as expected
- Hanging wreaths without a secure hook rated for the weight, especially outdoors where wind adds stress
- Forgetting scale: a tiny ornament on a huge tree or an oversized swag on a narrow shelf both look off
- Storing finished pieces without drying or cleaning them first, which invites mold and pests
Tips for Better Results
Work in odd numbers when grouping items, since three or five tends to look more natural than two or four. Use a variety of textures, combining something matte with something glossy and something soft with something rigid. Photograph your project from across the room, not just up close, to judge the overall effect. Finally, plan your storage before you finish. Our guide How to Store Christmas Decorations So They Last covers how to keep handmade pieces intact for the next season.
Recommended gear
A reliable glue gun and a few basic wire tools will cover most of the projects above. Search for a View on Amazon for clean, strong bonds on wood and greenery, and a View on Amazon for wrapping stems neatly. A View on Amazon keeps wire ends from crushing, and View on Amazon give you a ready base for painted or stained projects.
FAQ
What are the easiest DIY for Christmas decorations for beginners?
Felt ornaments, pinecone garland and mason jar centerpieces are good starting points. They need few tools, tolerate small mistakes, and can be finished in one or two sessions.
How far in advance should I start my DIY decor?
Plan for at least three to four weeks before your target display date. Projects that need paint or clear coat drying, such as painted ornaments or wooden stars, need extra time.
Can I use real greenery in DIY decorations?
Yes, but real greenery dries out over time. Mist it lightly, keep it away from heaters, and replace it after a few weeks indoors. Faux stems are better for long displays.
How do I keep DIY decorations from looking homemade?
Stick to a limited palette, use consistent materials and repeat a few key shapes. Uniform sizing and clean wrapping make a big difference.
Are DIY decorations safe around children and pets?
Many are, but small parts, string, glitter and pointed wood can be hazards. Choose sturdy, larger elements for low areas and secure anything that could be chewed or swallowed.
What glue works best for Christmas crafts?
A hot glue gun works well for wood, greenery and most ornaments. For fabric or delicate items, a fabric-safe adhesive or a low-temperature glue gun is gentler.
How should I store my handmade decorations?
Let all pieces dry completely, keep them in a cool, dry place, and wrap delicate items in acid-free tissue. Avoid sealing damp greenery in plastic.
Conclusion
DIY for Christmas decorations works best when you plan your palette, measure your spaces and choose projects that match your time and skill. Start with one or two simple pieces, then build outward as your confidence grows. A cohesive, carefully finished display will always look more inviting than a room full of unrelated crafts, so keep your materials consistent and your placement intentional.
Related reading
- How to Store Christmas Decorations So They Last
- Hobby Lobby Christmas Decorations: 8 Best Picks for Every Holiday Style (2026)
- Grinch Decorations for Christmas: 9 Ideas to Steal the Show
- Doorway Christmas Decorations Ideas: 9 Front Door Looks for Every Style
- Christmas Yard Decoration Ideas and How to Set Them Up Safely
- Christmas Holiday Table Decorations: 10 Best Picks for Every Setting
Ready to choose one?
About Colin Foster
Colin Foster is part of our editorial team and reviews and edits our christmas decorating guides, checking product details against manufacturer specifications and owner feedback.