 By Colin Foster
DIY Christmas holiday decorations let you build a festive home from materials you already own or can find easily, and the results often look more personal than anything bought off a shelf. In this guide you will plan a color palette, gather the right supplies, and complete several projects that work on mantels, doorways, trees, and tabletops. Along the way you will also learn the mistakes that trip up most first-time crafters.
Start With a Color Palette and Theme
Handmade decor looks most polished when everything shares a color story. Before you cut a single piece of ribbon, choose three to five colors and one or two textures. A common approach is to pick a dominant neutral, such as cream or warm white, then add one accent color and one metallic. Pine green, deep burgundy, and brass is a classic combination. Blue, silver, and white reads cooler and more modern.
Shopping for one? See our guide: 8 Best Antique Vintage Christmas Decorations for Heirloom Holiday Style.
Once you have your palette, decide on a theme. Rustic themes lean on kraft paper, twine, dried oranges, and pinecones. Traditional themes use velvet, glass ornaments, and gold accents. If you want a deeper dive into specific looks, the article on Rustic Christmas Decor Ideas: Natural, Textured and Warm covers natural materials in detail, and Traditional Christmas Decor Ideas explains how to layer classic pieces.
Tips for Choosing Colors
- Pull one accent color from something you already own, such as a rug or throw pillow.
- Limit metallics to one finish. Mixing gold, silver, and copper at once usually looks busy.
- Test your palette on a single project, such as one wreath, before committing to a whole room.
Gather Your Supplies and Tools
Most DIY projects rely on the same basic toolkit. Having these items ready before you begin prevents mid-project trips to the store and keeps your workspace tidy.
- Hot glue gun with extra glue sticks
- Floral wire in 22-gauge and 26-gauge
- Wire cutters and sharp scissors
- Craft wire or pipe cleaners for shaping
- Ribbon in two or three widths
- Clear plastic bags or wrapping for a waterproof base
- A cutting mat and ruler for measuring fabric and paper
- Painter’s tape to hold pieces in place while glue sets
Natural materials such as pinecones, dried citrus, cinnamon sticks, and eucalyptus can often be foraged from your yard or purchased in bulk from a craft store. Wash and dry any foraged plant material thoroughly to remove insects and moisture before you use it indoors.
Project 1: A Simple Fabric Wreath
A fabric wreath is one of the most forgiving starter projects because it hides small imperfections. You will need a foam or wire wreath form, strips of fabric about 8 inches long and 2 inches wide, and floral wire.
Steps
- Cut 40 to 60 fabric strips, depending on how full you want the wreath.
- Fold each strip in half lengthwise and push it through the wire frame.
- Pull the ends through the loop and tighten gently, working around the form in an even pattern.
- Alternate two or three fabrics for a balanced look.
- Add a bow at the top with wire ends tucked into the frame.
Project 2: Mason Jar Ornaments and Lanterns
Glass jars fitted with battery tea lights or small string lights make an easy centerpiece or windowsill display. Fill the bottom two inches of a clean jar with faux snow, dried cranberries, or small glass beads, then add a battery candle. Tie a strip of burlap or plaid ribbon around the neck. Battery lights are the safe choice for indoor and outdoor use, since open flames near dry greenery create a real fire risk.
Project 3: Pinecone and Dried Orange Garland
Garland made from natural materials has a warm, textured look that suits rustic and farmhouse homes. Thread a heavy jute or cotton cord through the base of each pinecone using a large needle, spacing them about three inches apart. Between the cones, add slices of dried orange, cinnamon sticks, or small bundles of dried eucalyptus. Dry citrus slices in a low oven at about 200°F for two to three hours, flipping them halfway, until they feel firm and no longer damp.
Project 4: Ornaments From Simple Materials
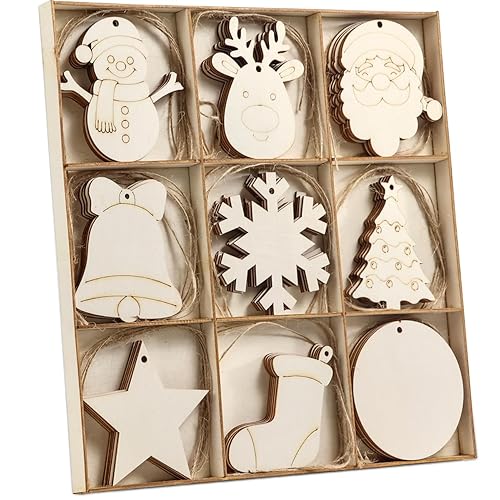
Ornament-making is a great way to use leftover craft supplies. Wooden circles, clear glass baubles, and salt-dough shapes all work well. For a deeper set of ideas, see DIY Christmas Ornaments: 10 Easy Projects with Simple Materials, which walks through several techniques step by step. If you enjoy handmade table pieces, DIY Christmas Centerpieces: 6 Easy Projects offers ideas that pair nicely with homemade ornaments.
Project 5: A Mantel Garland With Lights
A mantel garland anchors the room and frames the fireplace. Use a faux garland as your base, then wrap it with warm white lights. Weave in ribbon at intervals, and tuck in a few stems of greenery or pinecones. For more mantel layout ideas, Best Christmas Mantel Decorations shows how to balance height and symmetry.
Layout and Placement Tips
Good placement matters as much as good crafting. Group decorations in odd numbers, such as three candles or five ornaments in a bowl, since uneven groupings look more natural. Vary heights by using stacked books, boxes, or tiered trays. Keep your focal point obvious, usually the tree, mantel, or front door, and let smaller projects support it rather than compete.
Safety Considerations
Holiday decor carries real fire and electrical risks. Keep candles and open flames away from paper, fabric, and dried plant material. Use only lights rated for the location, whether indoor or outdoor, and check cords for cracks before plugging them in. Do not run extension cords under rugs. If you plan to hang decorations outdoors or near an electrical outlet, consult a licensed electrician for anything beyond basic plug-in strings.
Common Mistakes
- Too many colors: Sticking to a palette of three to five colors keeps the result cohesive.
- Skipping the test piece: Make one wreath or one garland section before doing the full set.
- Using wet or fresh plant material indoors: Moisture encourages mold and insects. Dry everything first.
- Overusing hot glue on delicate items: Glue can show through thin fabric or cause warping on some plastics. Use a small dab and test first.
- Ignoring scale: Oversized wreaths on a small door or tiny ornaments on a large tree can look out of proportion.
Tips for Making Projects Last
Store supplies in labeled bins so you can reuse them next year. Keep fabric pieces in a dry place to prevent fading. Consider the lifespan of each project: fresh greenery lasts a few weeks, while dried and artificial materials can be reused for years. For storage methods that protect handmade pieces, read How to Store Christmas Decorations So They Last.
Recommended gear
These supplies come up often in DIY holiday projects and make the work noticeably easier.
- Hot glue gun with a steady trigger: A full-size gun with consistent output helps you apply even beads on fabric and greenery. View on Amazon
- Floral wire assortment: Having both thin and heavy gauges lets you attach bows, wrap stems, and hang ornaments without weak spots. View on Amazon
- Wire wreath form: A sturdy metal frame gives fabric and greenery a reliable base to attach to. View on Amazon
- Battery tea light set: Flameless candles let you use jars and lanterns safely indoors and near decor. View on Amazon
FAQ
What are the easiest DIY Christmas holiday decorations for beginners?
Fabric wreaths, mason jar lanterns, and simple pinecone garlands are good starting points because they require few tools and little precision.
How far in advance should I start my DIY projects?
Plan at least three to four weeks ahead for projects that need drying time, such as dried citrus, and allow extra time for any shopping or foraging.
Can I make DIY decorations that work outdoors?
Yes, but choose weather-resistant materials such as sealed wood, metal, and UV-rated fabric. Keep natural materials under cover, and review the guide on DIY Outdoor Christmas Decor Ideas That Survive the Weather for more detail.
Are dried oranges safe to hang indoors?
Dried citrus is generally safe when fully dried and kept away from heat sources. Discard any slices that show mold or soft spots.
How do I keep handmade ornaments from breaking?
Wrap them individually in tissue or bubble wrap and store them in a rigid container. Hang heavier ornaments on sturdy branches close to the trunk.
What is the best way to hang a DIY wreath on a door?
Use an over-the-door hanger or a wall hook rated for the wreath’s weight. Avoid painted surfaces that may scratch under constant moisture.
Do I need a lot of space to try these projects?
No. Many projects, such as jar lanterns and small wreaths, fit on a kitchen table. The article on Small-Space Christmas Decorating: Ideas for Apartments and Tiny Rooms offers more ideas for limited spaces.
Conclusion
DIY Christmas holiday decorations reward a little planning with a home that feels distinctly yours. Start with a palette, gather a basic toolkit, and try one project at a time. Keep safety in mind, store your work carefully, and you will have a collection that improves each year.
Ready to choose one?
About Colin Foster
Colin Foster is part of our editorial team and reviews and edits our christmas decorating guides, checking product details against manufacturer specifications and owner feedback.