 By Colin Foster
Updated November 2026
DIY Christmas ornaments for outside are easier to make than most people expect, and they can survive a full winter of rain, wind, and freezing temperatures when you choose the right materials and finish them properly. In this guide, you will learn how to pick weather-resistant supplies, build a few reliable projects, seal and hang them so they hold up, and avoid the errors that cause most outdoor ornaments to fade, warp, or fall apart by mid-December.
Why Outdoor Ornaments Need Different Materials
An indoor ornament can be made from almost anything, but a piece that hangs from a porch rail or evergreen branch faces sun exposure, moisture, temperature swings, and wind. Materials that work well indoors, such as tissue paper, unsealed cardstock, or standard craft glitter, tend to bleed, curl, or shed within days of going outside. Outdoor projects need materials that either resist the elements on their own or can be protected with a sealer.
Shopping for one? See our guide: 5 Best Christmas Ornaments Blown Glass for Every Tree Style (2026).
Think in terms of three risks. Moisture causes paper to swell and cardboard to delaminate. UV light fades bright colors and makes some plastics brittle. Freeze-thaw cycles crack porous materials and loosen glued joints. Plan around all three before you start cutting.
Materials That Hold Up Well
- Sealed or painted wood, such as birch plywood, basswood, or thin pine cut into shapes
- Galvanized or aluminum sheet for stamped or embossed ornaments
- Acrylic sheet, clear or colored, for layered or stained-glass effects
- Polymer clay baked and then sealed with an outdoor-rated varnish
- Natural materials like pinecones, cinnamon sticks, and dried citrus, which should be sealed and wired to a hanging loop
- Weatherproof ribbon, such as polyester or nylon, instead of satin or cotton
- Stainless steel or brass wire for hangers and armatures
Tools and Supplies You Will Need
Most of the projects below use the same basic kit. Gather these before you start so you can move from one step to the next without stopping mid-project.
- Hand or jigsaw with fine-tooth blade, or a scroll saw for detailed cuts
- Sandpaper in 120 and 220 grit
- Drill with bits sized for your hanging wire or eyelets
- Exterior-grade primer and acrylic paint
- Outdoor-rated spray sealer or marine-grade varnish
- Stencils, painter’s tape, and a small foam brush
- Pliers, wire cutters, and brass or stainless eyelets
- Gloves and a dust mask for sanding and sealing
How to Build Weatherproof Ornaments Step by Step
The method below applies to most wood, clay, and metal ornaments. Read through it once, then adjust for your chosen project.
- Cut or shape your base. Trace your design onto the material, cut it out, and smooth all edges. Rounded edges resist chipping better than sharp corners.
- Sand thoroughly. Start at 120 grit to remove saw marks and finish at 220 grit. Wipe away dust with a dry cloth.
- Prime. Apply one thin coat of exterior primer on all sides, including the back and edges. Let it dry fully according to the can’s directions, which often means several hours.
- Paint in thin layers. Two or three light coats are stronger than one thick coat. Thick paint cracks when it expands and contracts.
- Add decorative details. Use stencils, dotting tools, or painter’s tape for crisp lines. Let each detail dry before moving on.
- Seal every surface. Apply two to three coats of outdoor sealer, allowing drying time between coats. Seal the back, edges, and any hole you drilled.
- Install hardware. Set eyelets or drill hanging holes after sealing if possible. If you drill later, reseal the exposed wood.
- Cure before hanging. Most sealers need 24 to 72 hours to cure fully. Check your product’s instructions and do not rush this step.
Sub-Step: Making a Sturdy Hanger
Use a double-looped wire or a short length of weatherproof cord threaded through two eyelets. Avoid single thin wire that can kink or cut into the material as the ornament sways. Stainless steel wire resists rust, while plain steel wire can streak your ornament and the branch beneath it.
Sub-Step: Protecting Natural Materials
Pinecones, cinnamon sticks, and dried orange slices need a different approach. Seal them with a clear matte spray in two light coats, letting each coat dry fully. For dried citrus, coat the slices lightly with a food-safe varnish designed for outdoor use, or accept that they will change color over time. Wire each piece to a hanger rather than gluing it, because glue often softens in heat and loosens in cold.
Project Ideas for Outdoor Trees and Railings
These projects are simple enough for beginners and sturdy enough for a porch or yard tree.
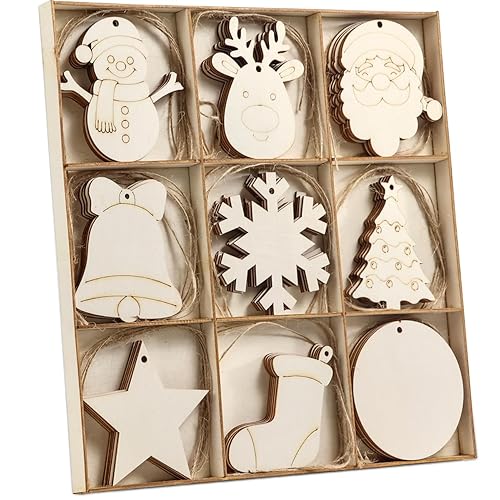
- Painted wood star or snowflake. Cut from birch plywood, paint in two colors, and seal.
- Stamped metal ornament. Use a metal stamping set on thin aluminum or galvanized sheet for a bright, rustic look.
- Layered acrylic disc. Stack two colored acrylic circles with a gap between them and attach with stainless hardware.
- Baked clay ornament. Shape polymer clay, bake according to the package directions, then seal with outdoor varnish.
- Pinecone bundle. Wire three sealed pinecones together with a loop of weatherproof ribbon.
- Stenciled wooden disc. Paint a plain round wood slice with a classic holiday design.
If you want more projects that work across different seasons and themes, see DIY Christmas Ornaments: 10 Easy Projects with Simple Materials for indoor-friendly ideas you can adapt for outside with better sealing. For bigger outdoor pieces, DIY Outdoor Christmas Decor Ideas That Survive the Weather covers larger installations and how to anchor them.
Choosing Colors and Themes That Work Outside
Outdoor lighting and daylight change how colors read. Deep reds and forest greens hold their look well against snow and evergreen branches. Pale pastels can wash out in bright sun, so use them as accents rather than the main color. For a coordinated look, pick three colors: one dominant, one secondary, and one metallic or neutral accent. If you are unsure where to start, Rustic Christmas Decor Ideas: Natural, Textured and Warm shows palettes built around wood, natural fiber, and muted tones that suit exterior settings well.
| Material | Weather Resistance | Best Use | Main Risk |
|---|---|---|---|
| Sealed birch plywood | High when sealed | Stars, snowflakes, flat shapes | Edge swelling if not sealed on all sides |
| Aluminum sheet | Very high | Stamped ornaments | Sharp edges, requires careful filing |
| Acrylic sheet | High | Layered or colored pieces | Scratches and cracks if dropped |
| Polymer clay with varnish | Moderate to high | Figures, shapes with detail | Cracking if not baked fully |
| Natural pinecones and spices | Low to moderate | Rustic bundles | Mold, color change, insect damage |
Common Mistakes to Avoid
- Skipping the back and edges. Moisture often enters through unpainted surfaces and causes warping from underneath.
- Using indoor glitter or craft glue. These shed or soften outdoors. Use exterior-rated adhesives or mechanical fasteners.
- Applying thick paint. Thick layers crack in freeze-thaw cycles. Build color with several thin coats.
- Hanging ornaments before they cure. Uncured sealer can stick to branches or yield to wind.
- Using satin or cotton ribbon. These fray, fade, and absorb water. Choose polyester or nylon.
- Ignoring placement. Ornaments in direct sun fade faster. Hang them where they get some shade, and rotate them if possible.
- Overloading branches. Heavy ornaments can bend thin branches or pull fixtures loose. Spread weight across several points.
Recommended gear
These items are useful for the projects above. Look for outdoor-rated versions and read the label for temperature and moisture ratings before buying.
- Outdoor-rated spray sealer: A clear, UV-resistant sealer keeps paint and wood from fading and absorbing moisture. Choose one labeled for exterior use. View on Amazon
- Stainless steel eyelets: These resist rust and hold up better than plain steel when wet. View on Amazon
- Metal stamping set: Useful for creating patterned aluminum or brass ornaments with clean, durable impressions. View on Amazon
- Polymer clay with bake instructions: A reliable clay that cures in a home oven gives you durable, shapeable ornaments. View on Amazon
Tips for Longer-Lasting Results
- Test one ornament outside for a week before committing your whole set to a finish.
- Store unused ornaments in a dry, sealed container away from direct heat.
- Check hangers after storms and tighten or replace them as needed.
- Label your paint and sealer colors so you can touch up chips in the same shade next year.
- Keep a small inventory of spare eyelets and wire for quick repairs.
FAQ
Can I use regular paint on outdoor Christmas ornaments?
Regular interior paint usually fades and peels outside. Use an exterior-grade acrylic paint over an exterior primer, then seal with an outdoor-rated clear coat.
How long do DIY outdoor ornaments last?
Well-sealed wood, metal, or acrylic ornaments often last several seasons, while natural materials like pinecones and citrus typically last one season. Results depend on climate, sun exposure, and how carefully you seal each piece.
Do I need to seal ornaments that will be under a covered porch?
Yes. Porches still expose ornaments to humidity, temperature changes, and wind-blown moisture. Sealing protects the material even when it stays dry most of the time.
What is the best hanging material for outside?
Stainless steel wire and polyester or nylon ribbon are good choices. They resist rust, UV damage, and moisture better than satin, cotton, or plain steel.
Can I make outdoor ornaments with kids?
Yes, but adult supervision is needed for sanding, cutting, sealing, and using sprays. Let children paint, stencil, or decorate with dotting tools, and keep sealers and sharp tools out of reach.
Are spray sealers safe to use indoors?
Spray sealers release fumes that can irritate the lungs and eyes. Work in a ventilated area or outdoors on a calm day, wear a mask, and follow the label’s safety guidance. If you have respiratory conditions, check with a doctor before using sprays.
How do I keep ornaments from freezing and cracking?
Choose flexible sealed materials, apply paint in thin coats, and avoid trapping water in crevices. Ornaments that cure fully before exposure handle temperature changes better.
Can I hang DIY ornaments on artificial trees outdoors?
Artificial trees are typically rated for indoor use. If you use one outside, secure it firmly and choose lightweight ornaments so the branches are not stressed by wind.
Conclusion
DIY Christmas ornaments for outside are within reach for most home crafters when you choose durable materials, prime and seal every surface, and hang them with weatherproof hardware. Start with one or two simple projects, test your finish, and build your collection from there. With careful preparation, your handmade pieces can brighten the yard for several winters.
Ready to choose one?
About Colin Foster
Colin Foster is part of our editorial team and reviews and edits our christmas decorating guides, checking product details against manufacturer specifications and owner feedback.