 By Colin Foster
Updated November 2026
Christmas ornaments DIY ideas can turn a plain tree into something personal, and most of the projects below need only basic supplies and an afternoon. This guide walks through 12 approaches grouped by material and skill level, explains the tools you will need, and shows you how to avoid the mistakes that make homemade ornaments crack, fade, or sag. By the end, you will have a clear plan for choosing a project, a color palette that ties your tree together, and a method for finishing ornaments so they last for years.
Start With a Color Palette and Theme
Before you cut a single piece of felt or mix any dough, decide on a palette of three to four colors. A limited palette makes homemade ornaments look intentional even when every piece is different. A common approach is one dominant neutral (cream, natural wood, or silver), one accent color (deep green, burgundy, or navy), and one or two metallic or contrast tones for highlights. If you are unsure where to begin, our guide to Ideas for Christmas Tree Ornaments: 12 Themes and Styles to Try covers the most popular themes and how they translate to ornament form.
Shopping for one? See our guide: Outdoor Christmas Ornaments DIY: 7 Best Blank Kits to Make at Home.
Write your palette down and keep it nearby. When you are choosing ribbon, paint, or glitter, you can check each choice against the list instead of second-guessing yourself at the craft store.
Easy DIY Christmas Ornament Projects by Material
The ideas below are arranged by material because the material usually determines the difficulty, drying time, and durability. Each entry lists what it is best suited for.
Salt Dough Ornaments
Salt dough is one of the cheapest and most forgiving materials for beginners. A basic recipe uses one cup of all-purpose flour, one-half cup of salt, and roughly one-half cup of water, adjusted until the dough holds its shape. Roll it to about one-quarter inch thick, cut with cookie cutters, and make a hole for a ribbon loop with a straw before baking. Bake at a low temperature, around 200°F, for two to three hours, flipping once, until fully dry. Thick pieces may need longer. Seal with two coats of acrylic spray to protect against moisture and handling.
Felt Ornaments
Felt is soft, quiet, and easy to cut, which makes it ideal for children and for simple shapes like stars, hearts, trees, and animals. Layer two pieces of felt, stitch around the edge with a running stitch or blanket stitch, leave a gap, stuff lightly with polyester fiberfill, and close. Add embellishments such as embroidered initials, sequins, or small buttons. Our article on Diy Felt Christmas Ornaments: 5 Best Kits and Picks for Every Tree (2026) covers kit options if you prefer starting with pre-cut shapes.
Wooden Disc and Slice Ornaments
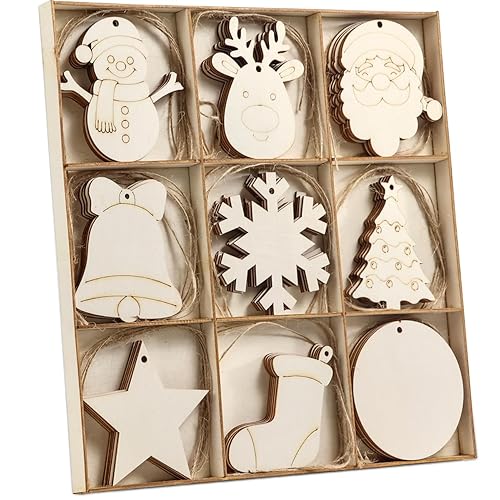
Wood slices or unfinished wooden discs, about two to three inches across, take paint, stain, and decoupage well. Sand the edges, paint a base color, let it dry fully, then add stencils, hand lettering, or simple line art. Drill a small hole near the top with a 1/16-inch bit before finishing so the hole is not clogged by paint. Seal with a matte or satin varnish.
Beaded and Wire Ornaments
Beaded ornaments are a good option for people who like repetitive, calming work. Thread glass or acrylic beads onto wire, shape the wire into a star, wreath, or cone, and finish with a loop of ribbon or thread. Keep bead colors within your palette and vary bead sizes for texture.
Paper and Cardstock Ornaments
Paper ornaments are fast and inexpensive to produce in quantity. Fold accordion-style stars, spiral-cut paper cones, or layered rosettes from heavy cardstock (65 lb or heavier works best). Reinforce folds with a small amount of glue and attach a hanging loop with thread. Paper is the most fragile option, so these work best on trees that are not heavily trafficked by pets or small children.
Photo and Memory Ornaments
Photo ornaments use a printed image set inside a clear acrylic disc, a wooden frame, or a plain round blank. Print on photo paper at the correct size, trim carefully, and seal with a clear laminate or spray. Family photos, pet portraits, and travel memories make strong gifts.
Tools and Supplies Checklist
Gathering supplies before you start prevents mid-project trips to the store. Most of the projects above need only some of the following:
- Rolling pin and parchment paper for salt dough
- Cookie cutters in two to three sizes
- Drinking straw or small round tip for making ribbon holes
- Baking sheet and oven thermometer
- Acrylic sealer spray (matte or satin finish)
- Craft felt, embroidery floss, and a fine needle
- Fiberfill stuffing
- Unfinished wood slices or discs and a 1/16-inch drill bit
- Acrylic paint, fine brushes, and a sponge for base coats
- Satin ribbon or cord, cut into 6-inch lengths for loops
- Hot glue gun and cooling time
- Scissors, a ruler, and a pencil
Step-by-Step: Making a Basic Salt Dough Ornament
- Mix one cup flour, one-half cup salt, and about one-half cup water until a firm dough forms. Add water a tablespoon at a time.
- Knead for three to four minutes, then wrap in plastic and rest for 15 minutes.
- Roll to one-quarter inch thick on floured parchment.
- Cut shapes and press a straw through the top to make a hole at least one-quarter inch from the edge.
- Transfer to a lined baking sheet and bake at about 200°F for two to three hours, flipping halfway through.
- Cool completely, paint if desired, and seal with two thin coats of acrylic spray, allowing drying time between coats.
- Thread ribbon through the hole and tie a loop.
Designing Your Ornaments for Long-Term Display
Good design decisions matter as much as good craftsmanship. Balance weight across the ornament so it hangs straight, keep embellishments flat or tightly attached, and test each ornament on a branch before committing to a full set. For a tree with heavy branches, choose lightweight materials like felt, paper, and thin wood. Ornament placement also affects how your work reads. Our overview of Decorating Ideas for Christmas Ornaments: 7 Styles and Layouts That Work explains how to group pieces by size and color so a handmade collection looks cohesive.
Recommended gear
A few supplies make specific projects easier and more durable. These are useful starting points rather than requirements.
- Acrylic sealer spray protects salt dough, painted wood, and photo ornaments from humidity and handling. View on Amazon
- Felt craft kit with pre-cut shapes saves time when you want consistent sizes for a large batch. View on Amazon
- Unfinished wood slices give you a uniform base for painted or stenciled ornaments. View on Amazon
- Fiberfill stuffing keeps felt and fabric ornaments plump and even. View on Amazon
Tips
- Make a test ornament first to check your dough thickness, bake time, and hole size.
- Work in batches of similar size so drying and baking times stay consistent.
- Label the back of ornaments with the year and project name if you are building a keepsake collection.
- Store finished ornaments in a dry box with tissue paper, not in a damp basement or garage.
Common mistakes
- Skipping the sealant. Unsealed salt dough absorbs moisture and can develop mold or crack. Seal every surface, including the back.
- Baking too hot. High heat browns the dough and can cause puffing or cracks. Low, slow baking gives a denser, more durable result.
- Making the hole too close to the edge. Thin edges tear under the weight of a ribbon. Keep the hole at least one-quarter inch in from the rim.
- Overloading with embellishment. Heavy glitter, beads, or buttons pull ornaments out of balance and stress the loop.
- Hanging fragile pieces low. Paper and thin wood are best placed higher on the tree where they are less likely to be bumped.
FAQ
What are the easiest Christmas ornaments DIY ideas for beginners?
Felt shapes, salt dough cutouts, and painted wood slices are the most forgiving. Each uses basic tools and does not require special technique, and mistakes are easy to correct.
How long does salt dough take to dry?
Baking at a low temperature usually takes two to three hours for standard thickness. Thicker pieces may need an additional hour. Let them cool fully before painting or sealing.
Can I make ornaments for an outdoor tree?
Yes, but choose weather-resistant materials and seal them thoroughly. Salt dough and paper do not hold up well outdoors, while sealed wood, weatherproof coatings, and certain plastics do better.
How do I keep felt ornaments from fraying?
Use a blanket or running stitch close to the edge and knot your thread securely. Felt does not fray in the same way as woven fabric, but loose stitching will eventually pull apart.
What paint works best on ornaments?
Acrylic paint adheres well to wood, salt dough, and cardstock. Let each coat dry fully before adding the next, and finish with a clear sealer to prevent chipping.
How many ornaments should I make for a standard tree?
A common guideline is 50 to 100 ornaments for a six- to seven-foot tree, though this depends on branch density and your style. Start with a smaller batch and add more after you see how they look.
Are homemade ornaments safe for children to make?
Many projects, including felt and paper ornaments, are suitable for children with adult supervision. Oven work, hot glue, and sharp tools should be handled by an adult. If you use paints or sealants, follow the label instructions and ensure good ventilation.
Conclusion
Christmas ornaments DIY ideas are easiest to manage when you choose a palette first, pick one material for your first batch, and test a sample before committing to the full set. Salt dough, felt, wood, beads, and paper each offer a different look and level of durability. With a clear plan and proper sealing, your handmade ornaments can become the pieces people look forward to unpacking each year.
Related reading
Ready to choose one?
About Colin Foster
Colin Foster is part of our editorial team and reviews and edits our christmas decorating guides, checking product details against manufacturer specifications and owner feedback.